I am originally a WinForm developer, recently i tried venturing to WPF just for fun.
So, I tried to create my first WPF UI, at first I thought adding a splitter would be straight forward like in WinForm development. So I was trying it out (Note: I have no idea on how to do it in WPF), after a while it gets kind of frustrating. since VS doesn't give you things out of the box, you need to make it. I search the internet but, with my short attention span I quickly lose interest reading the post.
So Lets Start this tutorial already!
Couple of notes:
- I would suggest to not use the WYSIWYG editor in VS.net instead check the XAML codes for more control in coding and less frustrations.
Step 1:- We create a new WPF Project by going to:
Files->New->Project
Navigate through the predefine project template select "Windows" and then choose WPF Application
It will create a new project and the initial XAML code similar to this:
testing
Notice there is a default Grid Tag this will serve as our working area.
Step 2: Defining the Rows or Columns for your Grid for the simplicity of this example we will only add Rows we can do this by adding the Grid.RowDefinitions tag right after the Grid Tag
Note: I declared 3 row definitions which means this Grid will have exactly 3 Rows. this is to accommodate 3 possible containers, for this example we have an upper content, the GridSplitter, and finally the lower content.
Also notice that I declare the Heights to *, Auto, 200, * means it will use the remaining space, while Auto will try to automatically calibrate its height, and 200 will be its height in pixels, you can also add a MinHeight Attribute to control its minimum height.
Step 3: Adding the Contents:
So this is the Actual Content, notice I added Grid.Row (starts with an index of 0) attribute for each control, this is to identify which control belongs to what row. you can also use Grid.Column if it was a vertical partition.
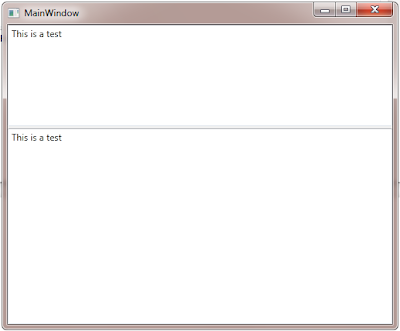
The finish product:
Although this is very simple example, nothing limiting you to do fancy stuff, like by grouping each section with another Grid and Placing the necessary Grid.Column, or Grid.Row Attribute. which would allow a "Nesting" of GridSplitter.
Overall managing this controls is much easier when dealing directly with the XAML script.